How to Draw an Easter Egg on Procreate


Here's a quick project to help you get acquainted with your new Better Marker Brush set! Please don't forget to download the tutorial files before we begin.
Let's start by creating a 3000 x 3000px canvas at 300 DPI. Draw a simple egg shape in the middle of your canvas.
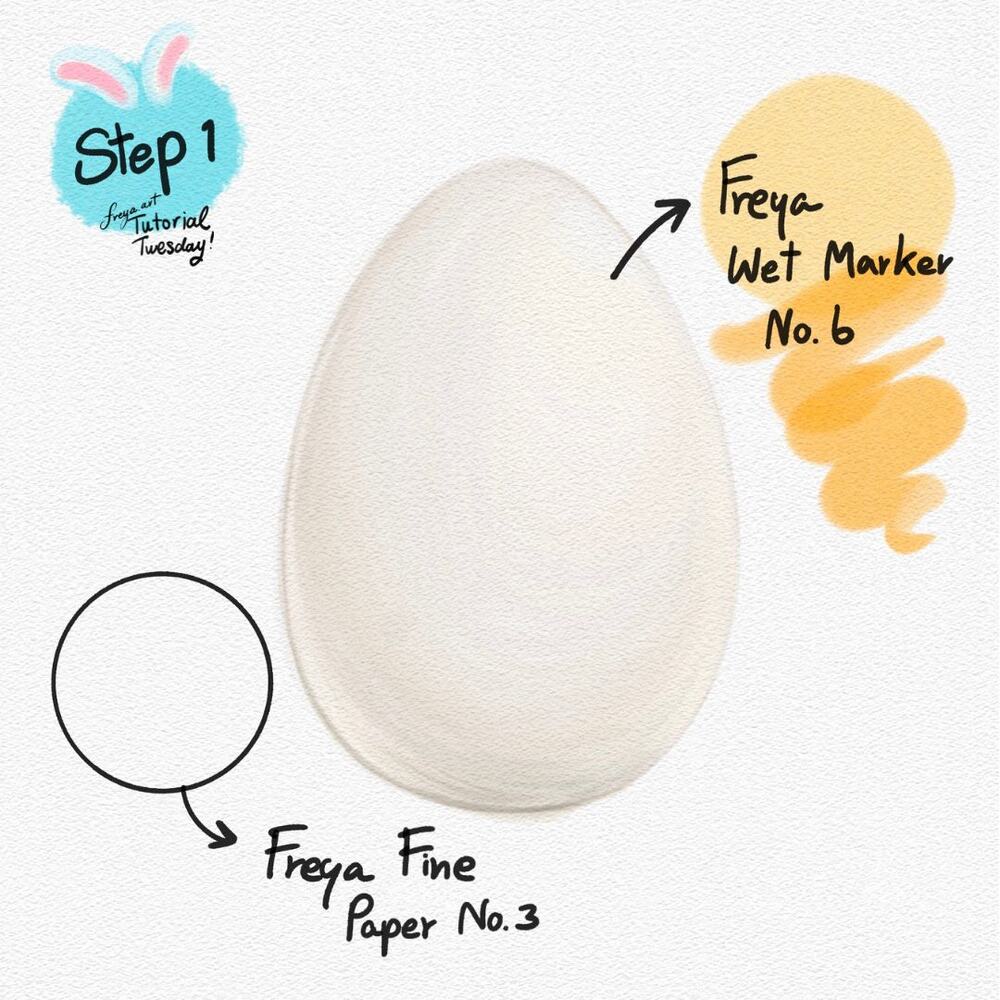
Step 1: In a new layer, add the Freya Fine Paper No. 3 texture using a light grey color. Change the color mode to Linear Burn and then lock the layer. Make sure that this layer is on top of all succeeding layers so that the entire canvas will take on the paper texture. Next, in another layer, draw the base color for the egg using Freya Wet Marker No. 6. Similar to actual markers, each stroke will create a denser color.
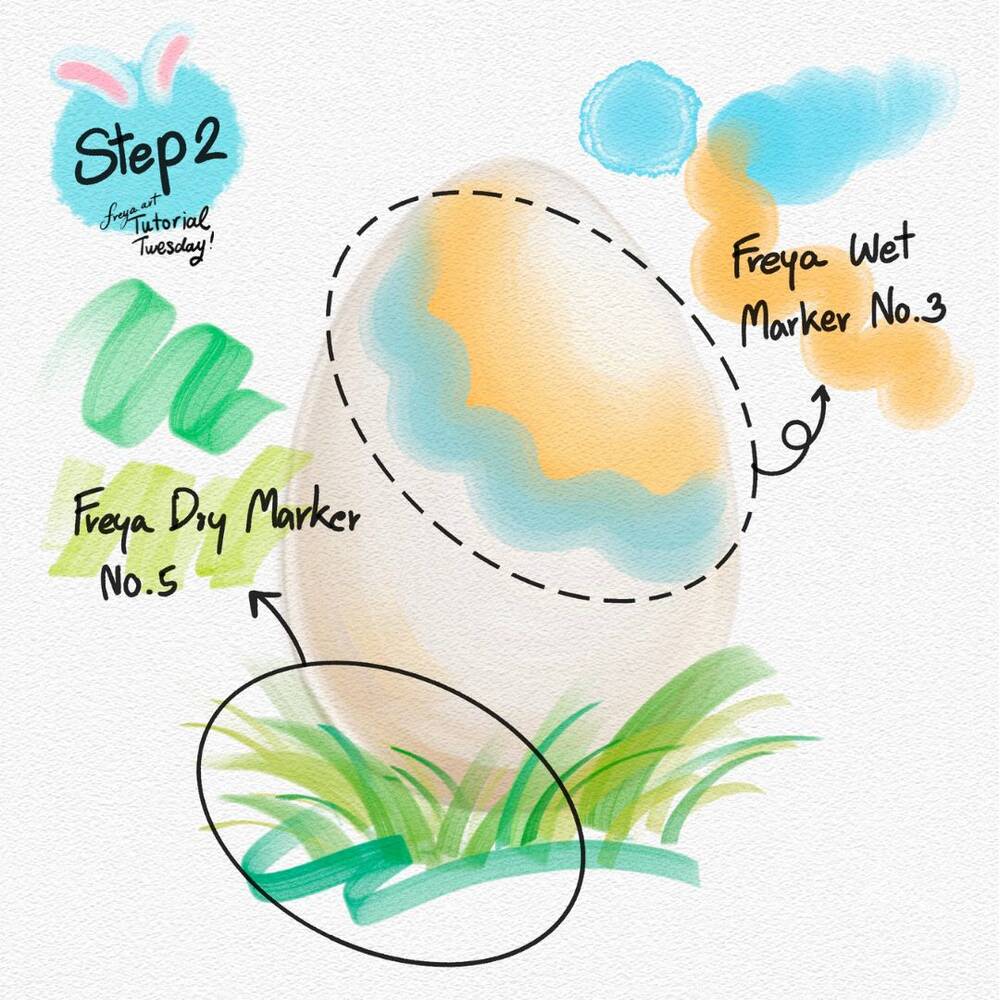
Step 2: Add a clipping mask on top of the egg layer, and start drawing some designs using the Freya Wet Marker No. 3 brush. Add some grass with the Freya Dry Marker No. 5.

Step 3: Add another clipping mask on top of the egg layer, and using the Freya Calligraphy Marker No. 8 brush, draw ribbons around the egg. Since this is a multi-colored brush, you can set different colors and they will saturate based on pressure.
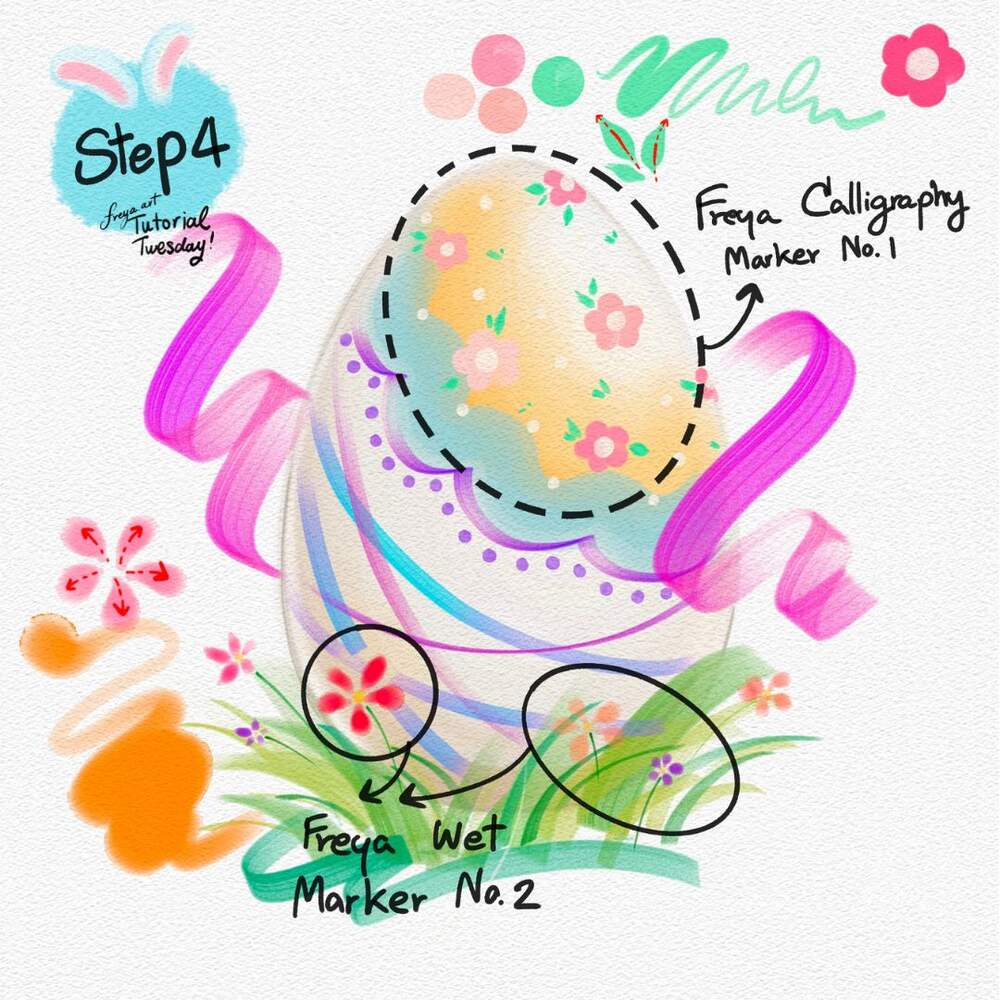
Step 4: Add the finishing touches with the Freya Calligraphy Marker No. 1 and Freya Wet Marker No. 2. I suggest doing your own style and design. Be creative!

Congratulations on completing this tutorial using the premium brushes from my Better Marker Brush Set! Please don't forget to share your work and tag me so I can see your version too! I'd love to share it on my IG stories!
See courses that go much more in depth
Discover tips and tricks for Procreate enthusiasts.
Masterclass for Procreate 2.0

Pet Portrait Purrfection
