
In this tutorial, we'll create a pumpkin cookie using the Halloween Pumpkin Cookie Brush Set. We'll build the cookie base with one brush, add icing decorations, and finish it with a spooky-cute detail.

Before You Start
Download the tutorial files, which include a swatch palette, cookie base, and free brushes. Open your Files app and go to the Downloads folder, then tap the ZIP file to unzip it.
Next, tap on the .brushset and .swatches files — they'll import automatically into Procreate. You'll find the brushes in your Brush Library and the palette in the Color Panel. Now open the cookie base (or a new canvas) and follow along step by step!
Step 1: Create the Cookie Base
Create a 3000 x 3000 px canvas with an RGB color profile for digital artwork.
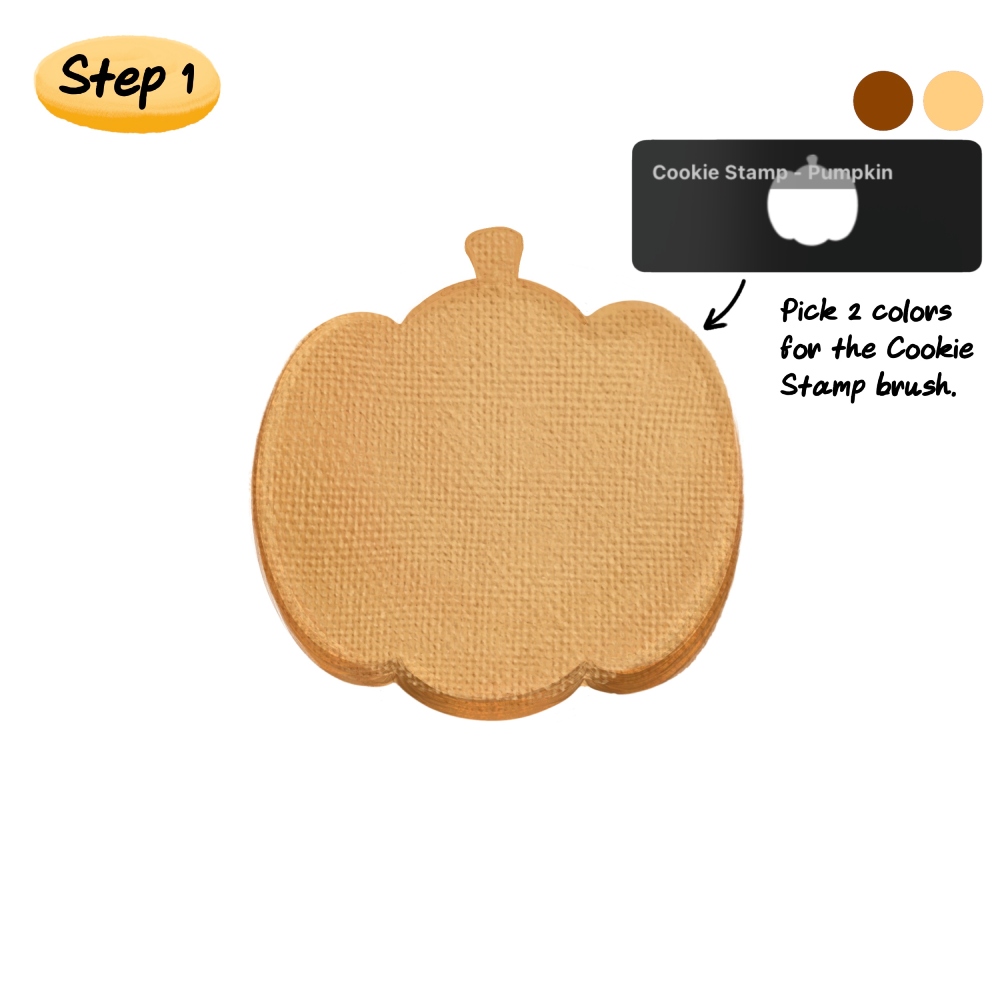
Choose the Cookie Stamp - Pumpkin brush. Pick 2 colors — light brown first, then darker brown in the color slots. Stamp once on a blank canvas to form the cookie base. You can also import the cookie base PNG file directly into the Procreate app.
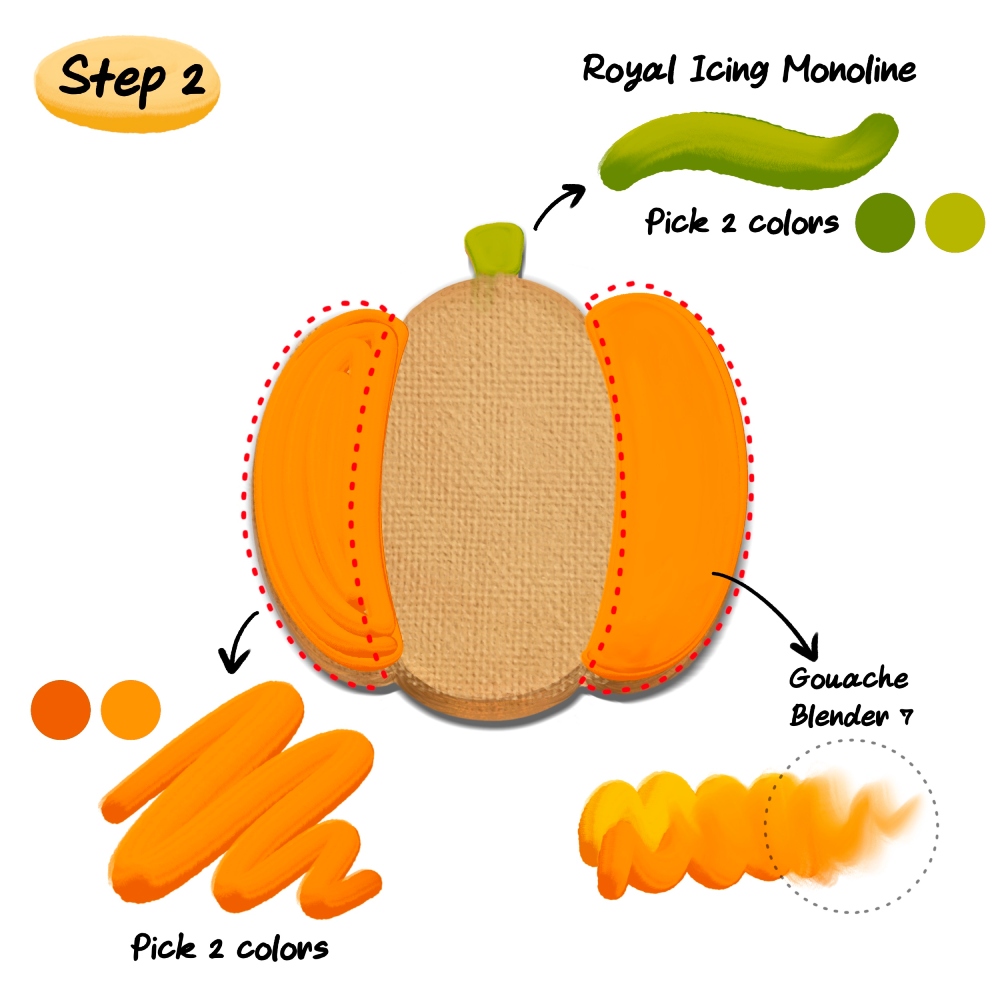
image caption here (optional)
Step 2: Add the Icing by Area
Create a new layer above the cookie base. Use the Royal Icing - Monoline brush and pick 2 orange shades for the pumpkin. Shape the left and right sections first, fill them in, then blend smoothly with Gouache Blender 7. Repeat the same steps with green shades for the stem.

Step 3: Add More Icing & Highlights
Add another new layer above. Repeat the icing steps to create the center section. Use the same Royal Icing brush to add lighter yellow highlights, then blend softly with Gouache Blender 7.
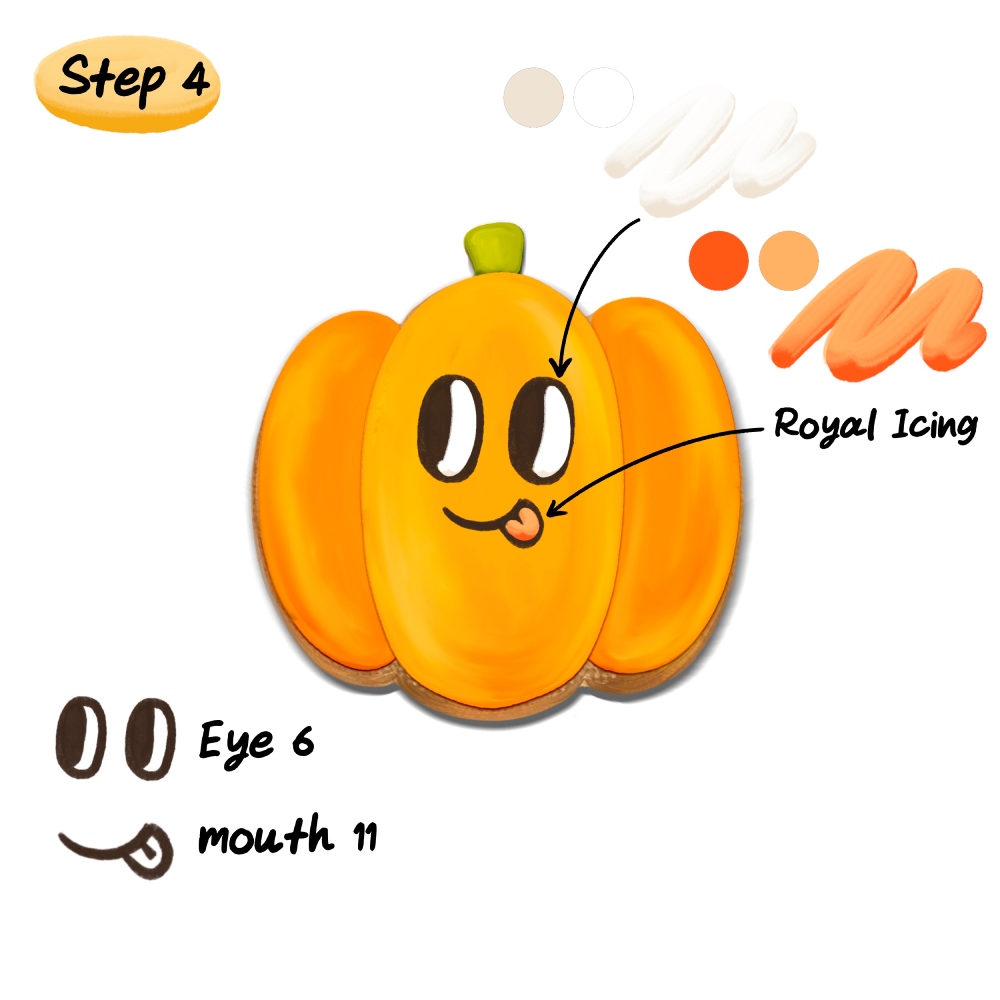
Step 4: Draw the Face
It's time to add a cute face!
Pick a dark brown color and draw it by hand, or use the Eye 6 and Mouth 11 stamps. Use the Royal Icing brush with white to fill the eye highlights, and coral for the tongue.

Step 5: Cut the Cookie
Once you're done decorating, flatten all layers. Use the Selection tool (Freehand) to select the part you want to cut, then tap Copy & Paste to duplicate it onto a new layer. With the cookie-cut layer selected and the selection still active, tap Invert, then create a Mask on the main cookie layer. Move the cookie-cut piece slightly away to create a separated look.
Remove any extra cookie parts if needed, then add a new layer below and paint depth behind it using Freya Gouache – Thin 6 in brown.
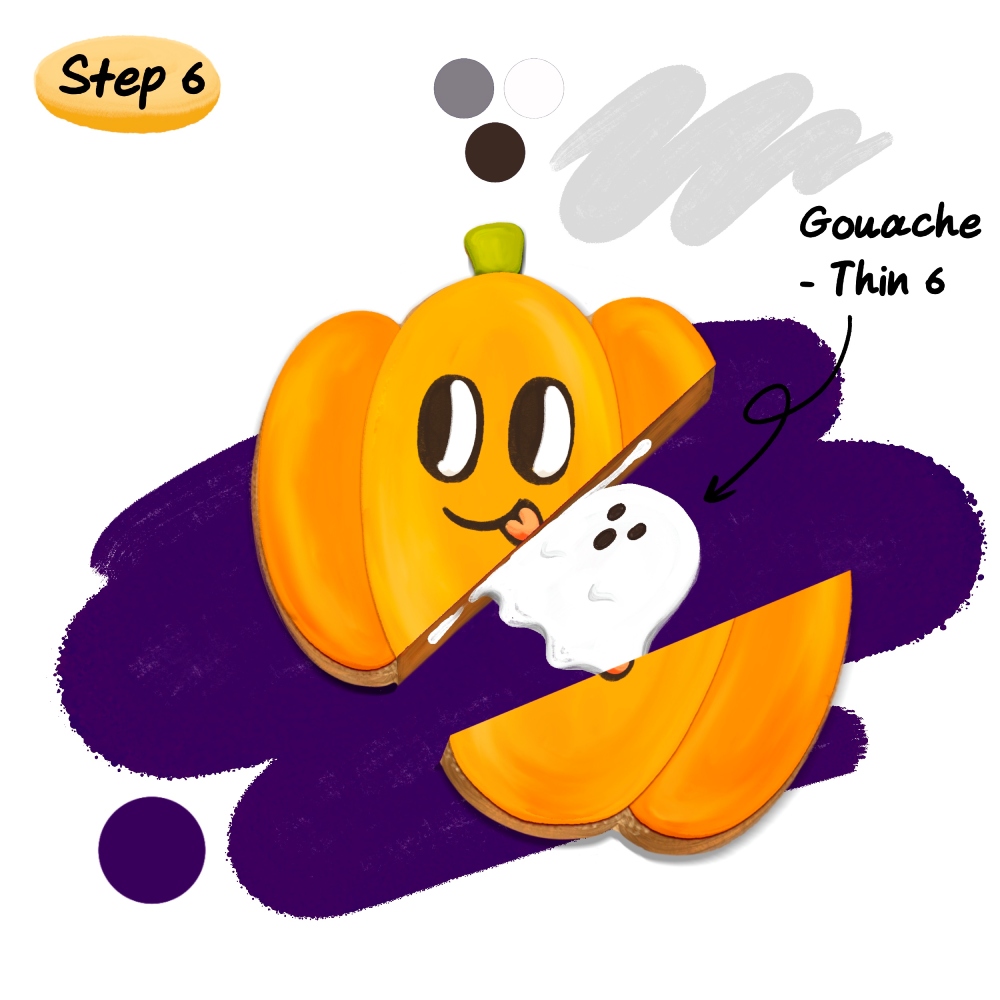
Step 6: Add the Filling
Fill the background with dark purple.Finally, use Freya Gouache – Thin 6 to paint a tiny ghost marshmallow filling between the cookie pieces for a spooky Halloween touch! 👻

And that's it — your pumpkin cookie is ready to serve! 🍪✨
Try customizing the icing colors or adding different fillings.
Don't forget to share your version with us — we'd love to see your spooky-cute creations! 👻
See courses that go much more in depth
Discover tips and tricks for Procreate enthusiasts.
Masterclass for Procreate 2.0

Pet Portrait Purrfection
