

How to Make a Spider Silk Brush for Procreate
Craft a spooky spider silk brush for Procreate! You'll adjust shape, stroke, rendering, and Apple Pencil settings for unique lines.
Grab the free brush for this tutorial
Made by Freya · works in any Procreate version
Hi there! It's October and we'll kick it off with another Halloween-themed tutorial! This time we'll make a Spider Silk brush for your spooky illustrations! Let's begin by opening a canvas. Then go to the 🖌️ Brush Library > Tap on the + sign to create a new brush.
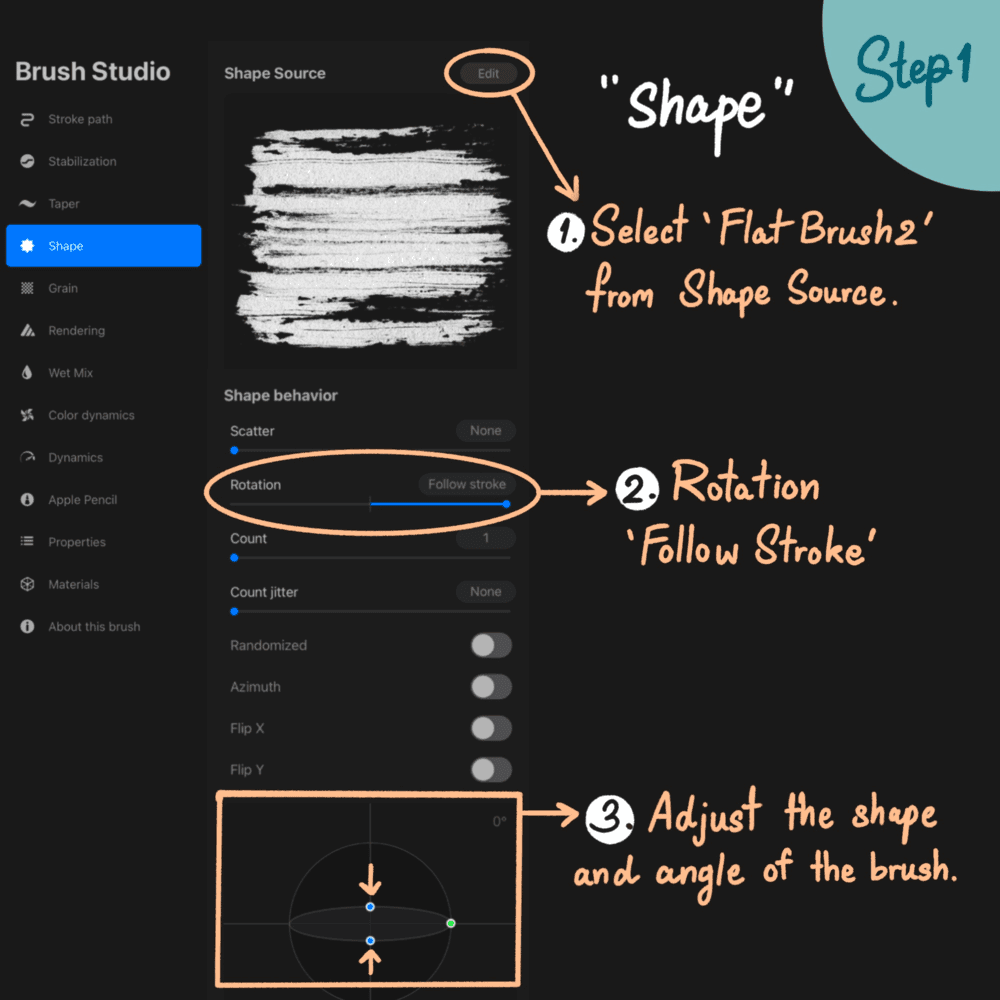
Step 1: On the left panel tap on "Shape" and select Flat Brush 2 from the Shape Source. This determines the basic form of the brush stroke. Adjust the Shape Behavior by maxing out the Rotation to "Follow Stroke" so the brush will rotate to follow the direction of your stroke, creating a more natural and fluid line. Then adjust the shape and angle of the brush as shown.
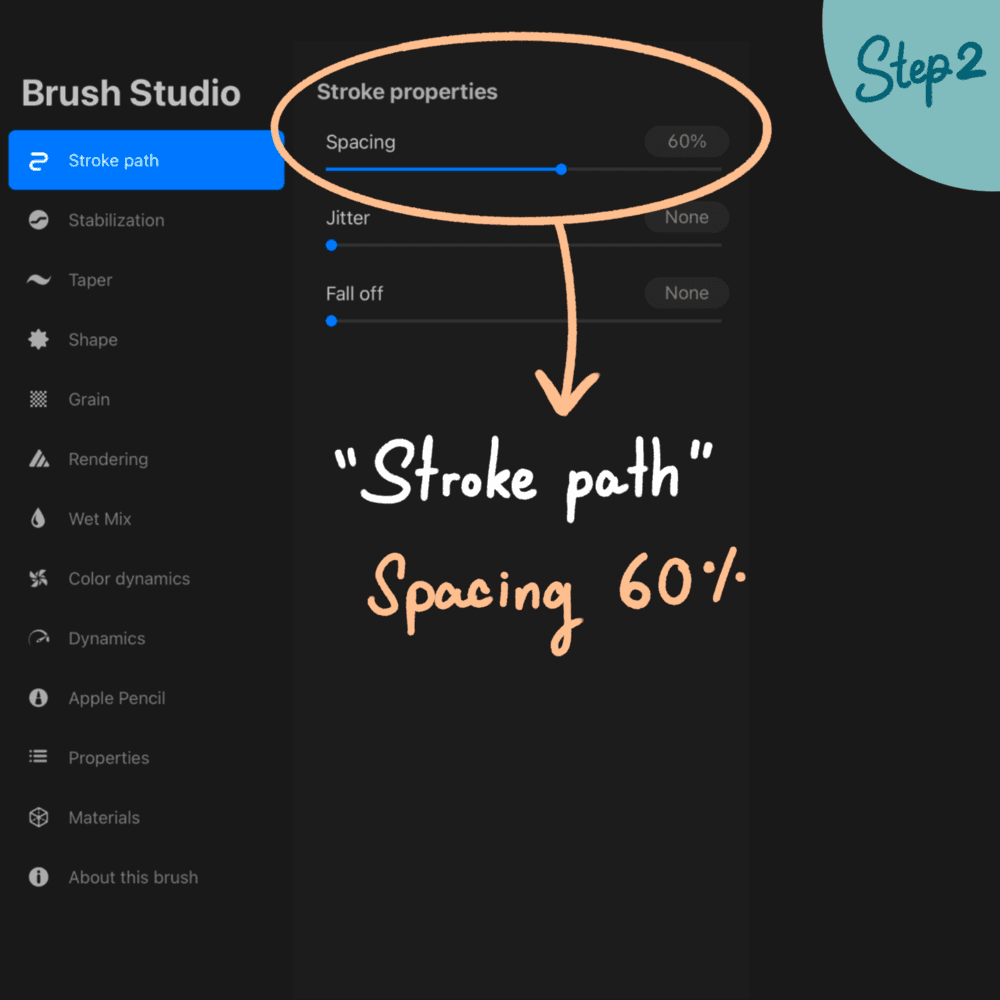
Step 2: Now go back to the left panel, and choose Stroke path. Set the spacing to 60%. Stroke path determines how the brush marks are placed along the path of your stroke. Spacing at 60% means there will be small gaps between each brush mark, creating a textured effect.
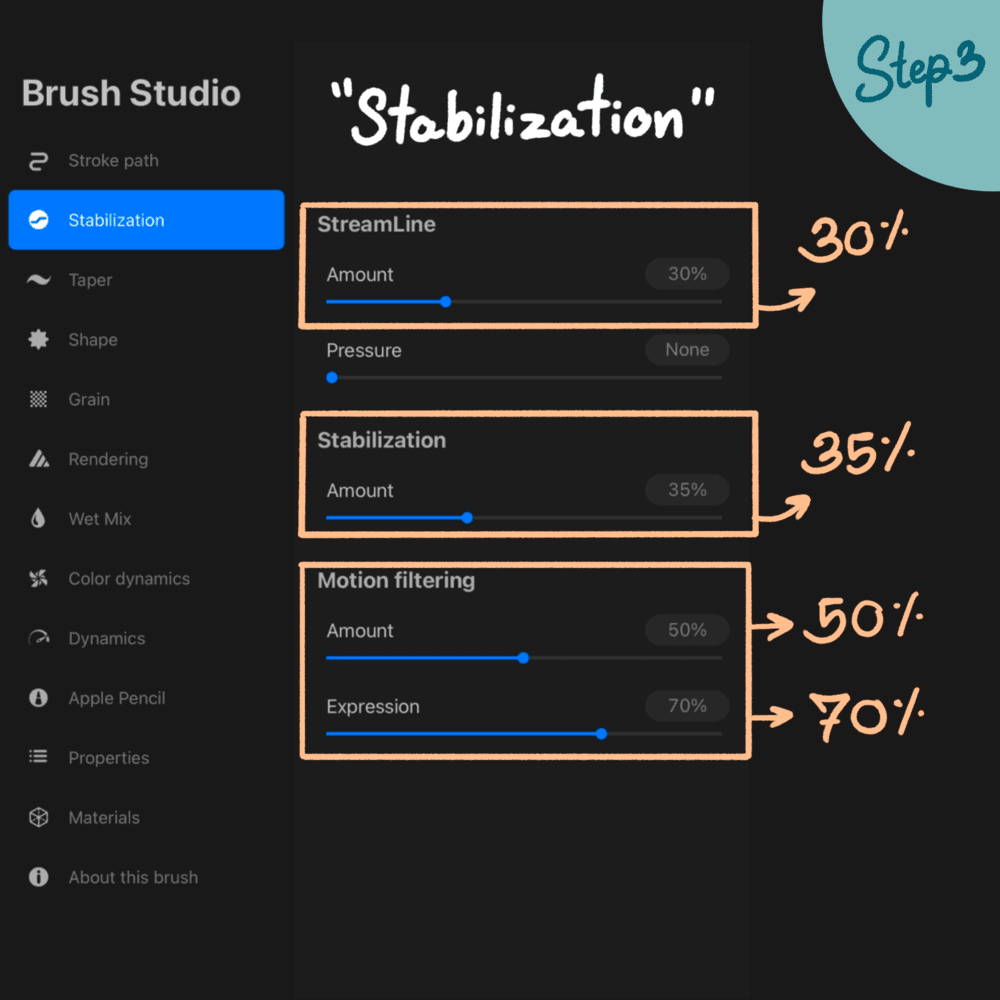
Step 3: Now let's go to Stabilization. Stabilization settings help smooth out your brush strokes. Adjusting the Streamline to 30% reduces shakiness and Stabilization at 35% further smooths the line. Motion filtering amount (50%) and expression (70%) work together to interpret and refine your hand movements, creating smoother, more controlled lines.
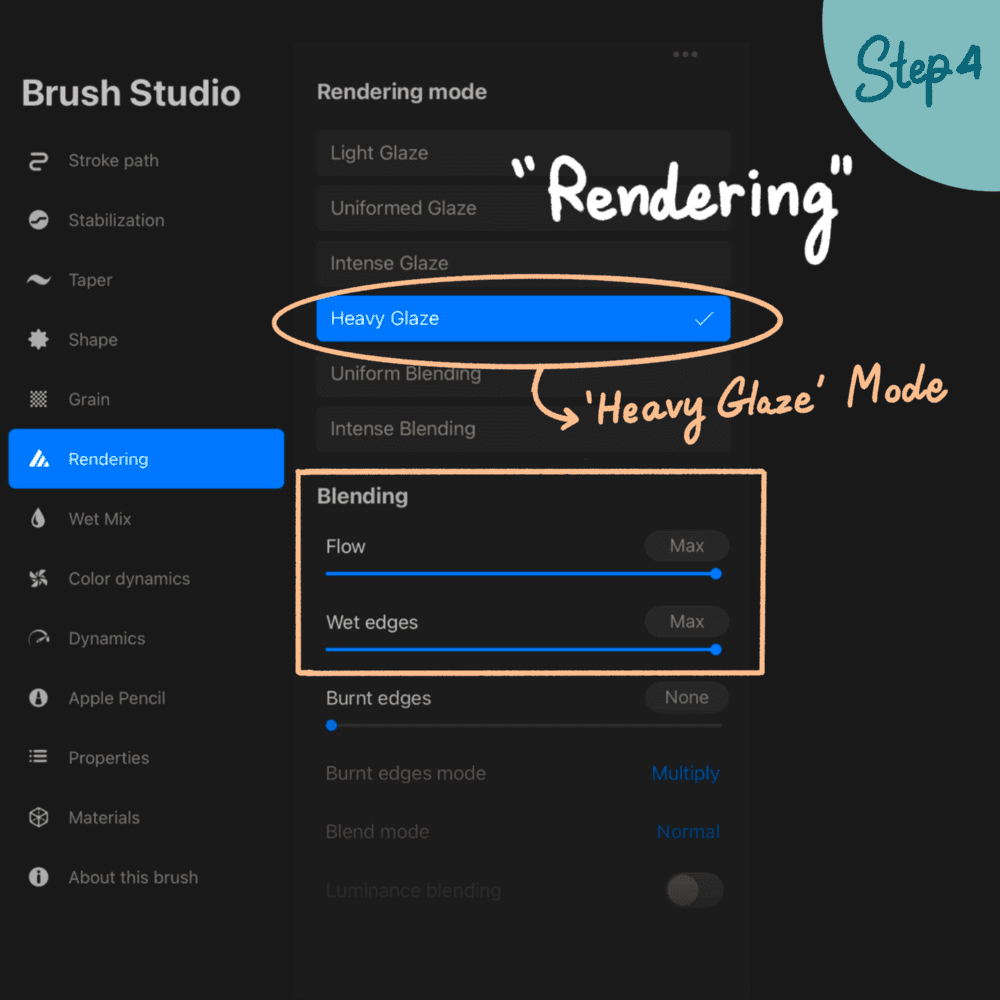
Step 4: Tap on Rendering to choose Heavy Glaze mode, and maximize the Blending flow and wet edges. Heavy Glaze mode likely creates a semi-transparent, layered effect. Maximizing Blending flow and wet edges will create soft, blended transitions between colors and strokes.
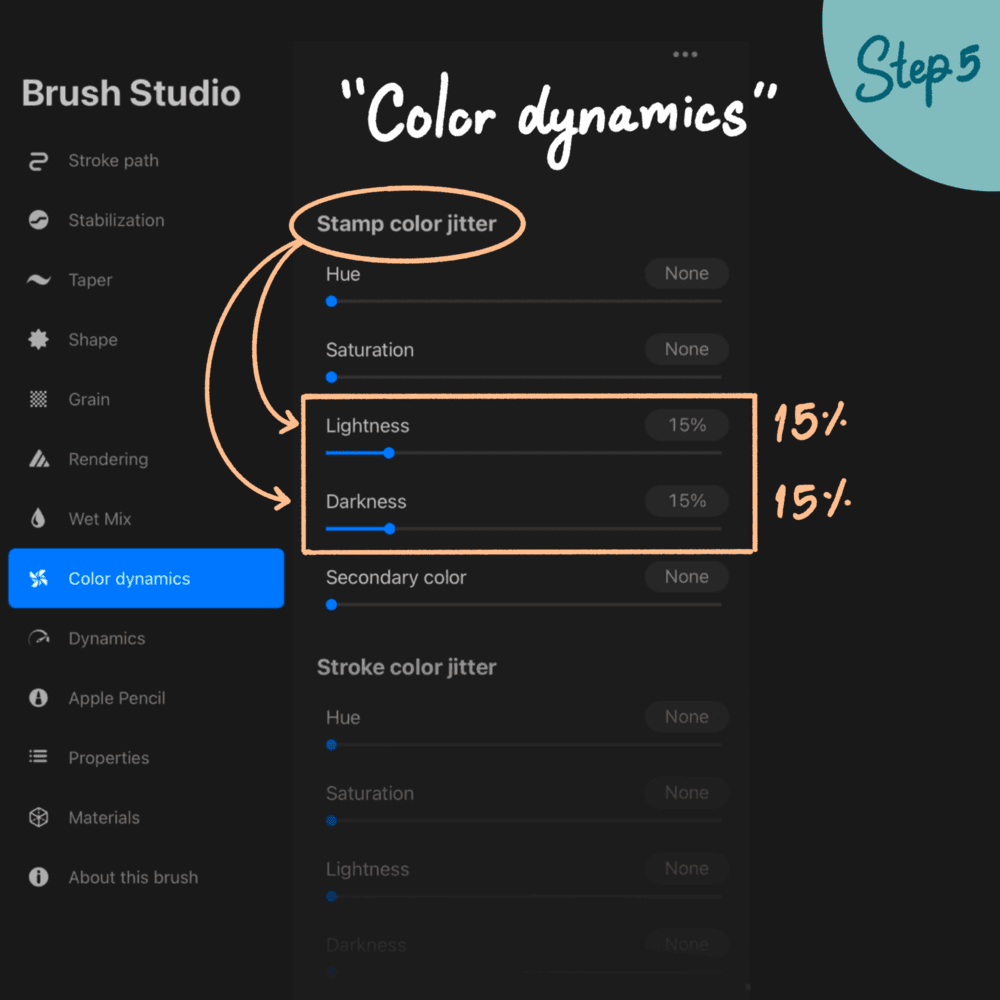
Step 5: Now let's go to Color Dynamics. Color Dynamics add variation to your brush color. Setting lightness and darkness jitter to 15% means the brush will randomly vary the brightness of your chosen color by up to 15%, creating subtle color variations.
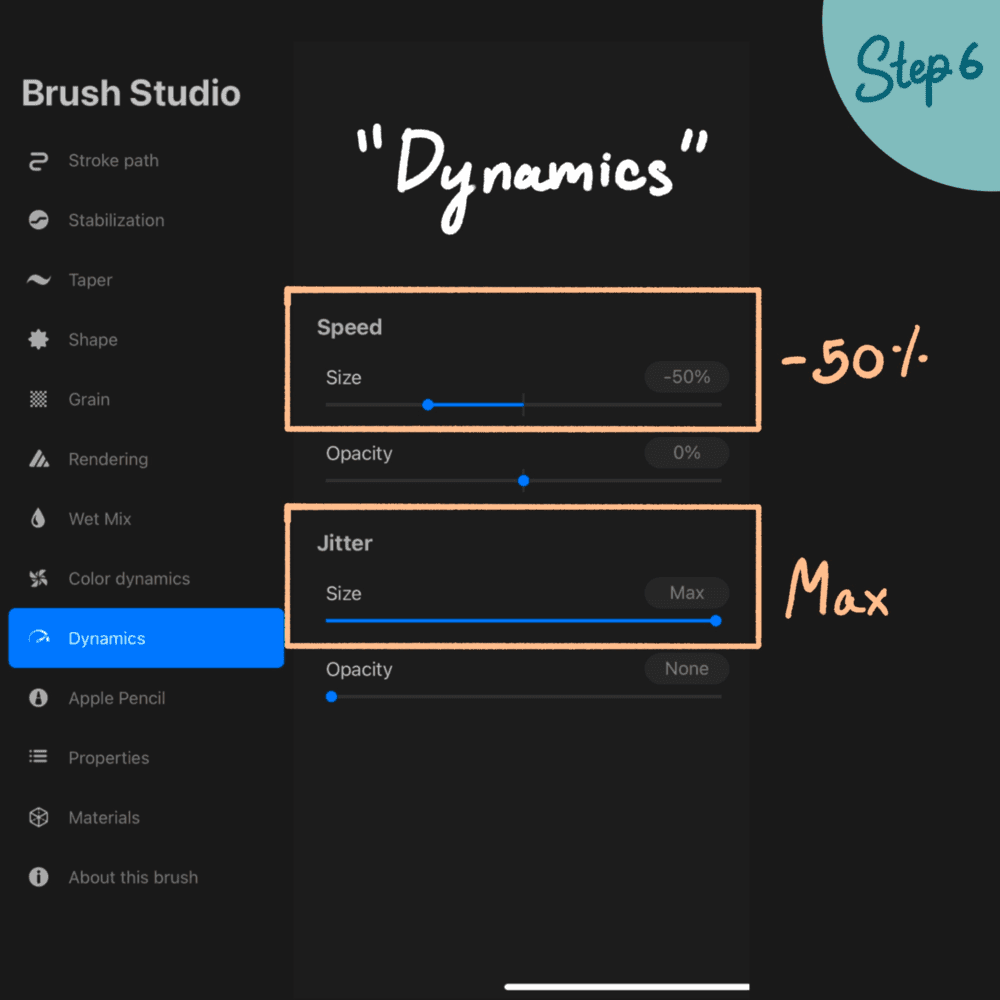
Step 6: Now let's adjust the Dynamics. Set the speed to -50% and max out the Jitter size. Dynamics control how the brush responds to your drawing speed. Speed at -50% means slower strokes will be thicker. Maxing out Jitter size will randomly vary the size of each brush mark, creating a more organic, textured look.
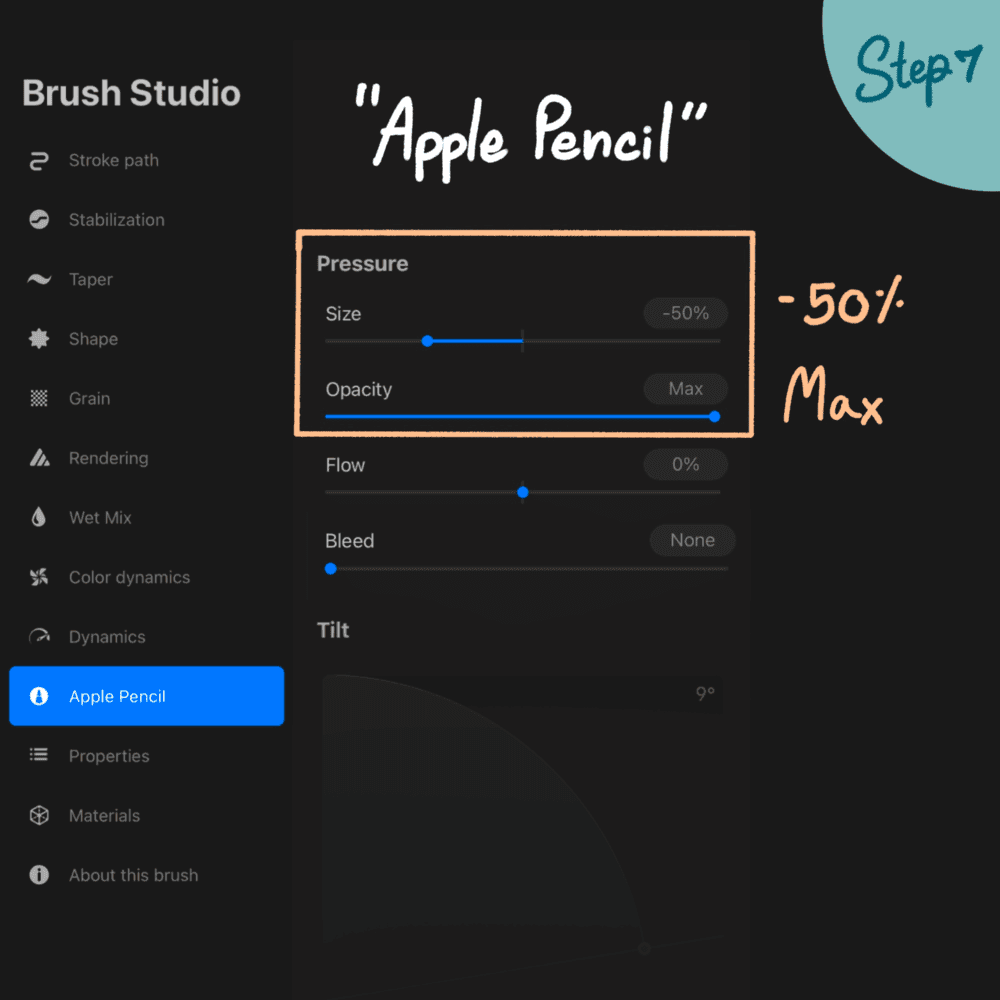
Step 7: Let's adjust the Apple Pencil settings for this brush. Set the pressure to -50% and the Opacity to max. These settings determine how the brush responds to pen pressure. Pressure at -50% means lighter pressure will create thicker lines. Maximum Opacity means the brush will always draw at full opacity regardless of pressure.
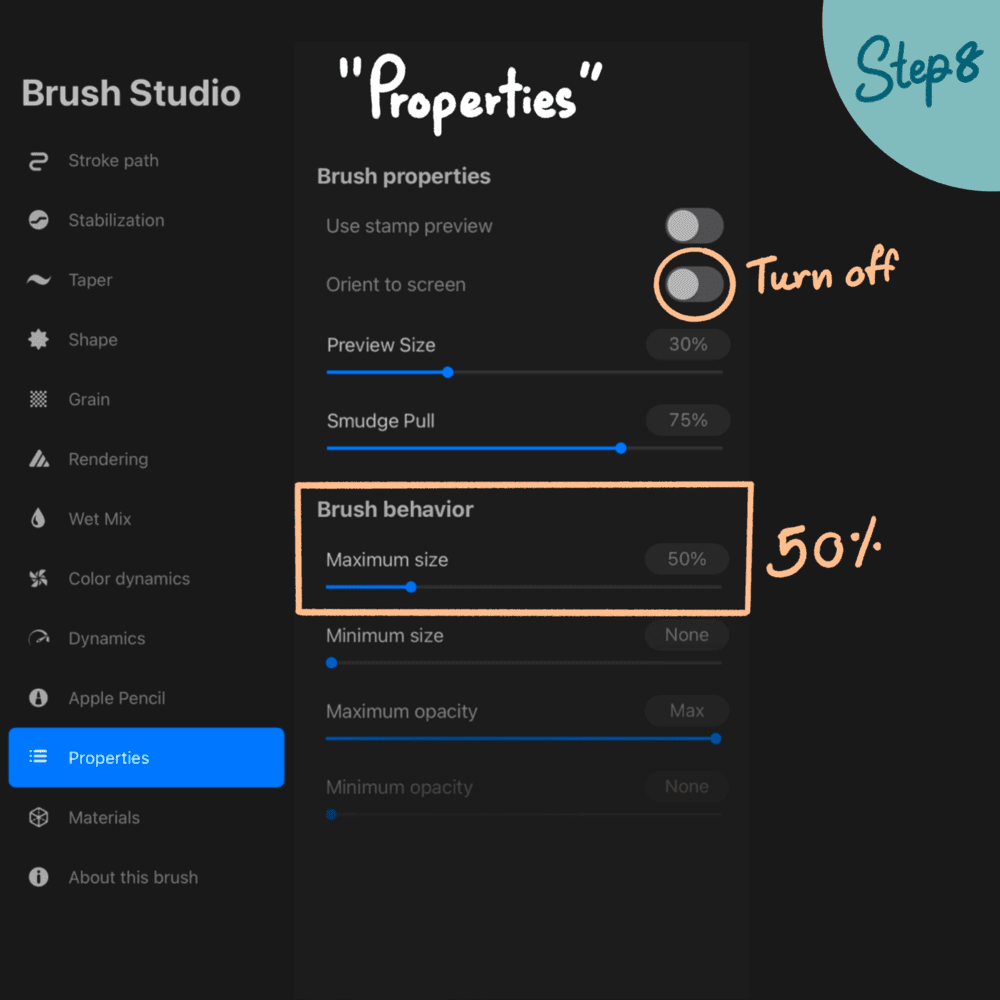
Step 8: And lastly, go to Properties and disable "Orient to Screen" and set Brush Maximum size to 50%. Disabling "Orient to Screen" means the brush won't change orientation based on how you hold your device.
Brush Behaviour is the set size and opacity boundaries on your brush. These settings control the upper and lower limits of the size and opacity sliders in the Procreate. Setting the Brush Maximum size at 50% will limit the maximum size of your new brush.
And now you've made your very own Spider Silk brush. 🕸️🕷️ If you want to learn more about how these brush settings work, please check out my Procreate Masterclass. I explain them in detail in Section 7 of the course! 😊
P.S.
I've included a copy of the the Spider Silk brush I made. Please make sure that you're on your iPad when you download it. Then locate it from your Downloads folder and import to Procreate. 😊
Try two real lessons from Masterclass for Procreate, free
Not a trailer. Actual lessons from the course. After you confirm your email, they open in Freya Studio and stay yours.
Halftone Tulip
The complete lesson, not a preview
Porcelain Plate Oil Painting
The complete lesson, not a preview
- Yours after email confirmation
- No card, no trial
- Opens in Freya Studio


